¶ Manage Advanced Bucket Management Settings
¶ Manage Buckets
Use the instructions in this section to configure ACLs for a bucket, edit, or delete a bucket
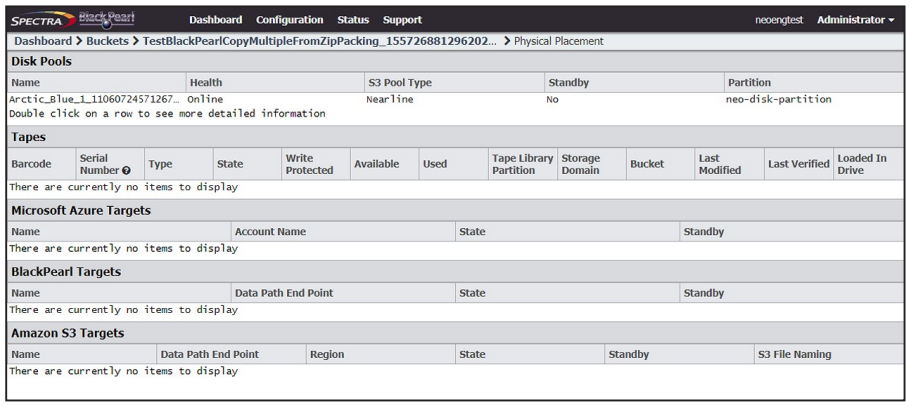
Once data is transferred to the BlackPearl gateway, you can view the physical placement of the data. The BlackPearl user interface displays data placement on disk pools, tapes, and replication targets. Use the instructions in this section to view physical placement of a specified bucket.
1. From the menu bar, select Configuration > Buckets. The Buckets screen displays.
2. Select the bucket for which you want to view physical placement and select Action > Show Physical Placement. The Bucket Physical Placement screen displays.
1. From the menu bar, select Configuration > Buckets. The Buckets screen displays.
2. Select the bucket for which you want to edit an ACL and select Action > Show Details. The bucket details screen displays.
3. Select the Access Control List you want to edit and select Action > Edit Bucket ACL. The Edit Bucket ACL dialog box displays.
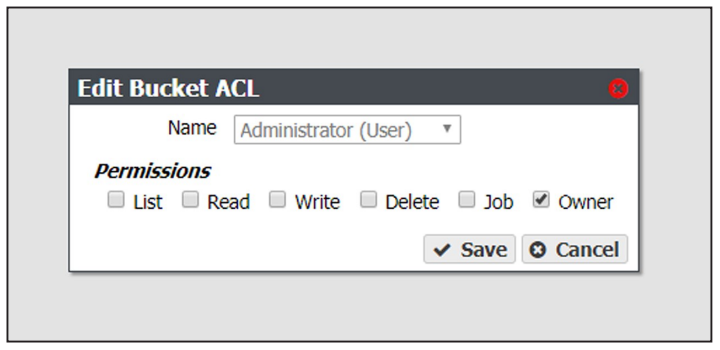
Note: You cannot change the user of an existing bucket ACL list. The Name drop-down list is unavailable.
4. Select or clear the desired Permissions for the bucket ACL.
5. Click Save.
Use the instructions in this section to delete an Access Control List (ACL) for a bucket.
1. From the menu bar, select Configuration > Buckets. The Buckets screen displays (see Figure 25 on page 93).
2. Select the bucket for which you want to delete an ACL and select Action > Show Details. The bucket details screen displays (see Figure 27 on page 94).
3. Select the Access Control List you want to delete and select Action > Delete Bucket ACL. The Delete Bucket ACL confirmation dialog box displays.
4. Click Delete.
Use the instructions in this section to change the owner of a bucket or to change the data policy used by the bucket.
1. From the menu bar, select Configuration > Buckets. The Buckets screen displays.
2. Select the bucket you want to edit and select Action > Edit. The Edit Bucket dialog box displays.
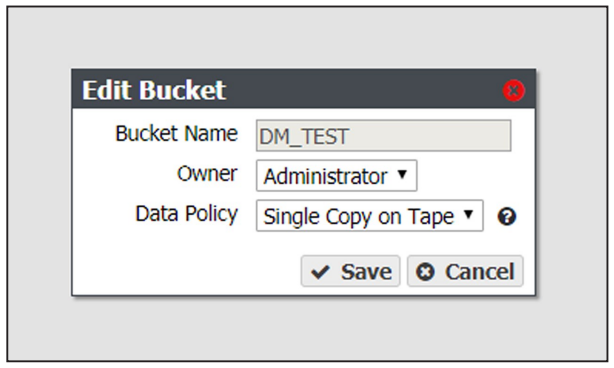
3. The Bucket Name is unavailable and cannot be changed.
4. From the drop-down list, change the Owner assigned to the bucket.
Important: After changing bucket owners, you may need to reconfigure your client application to access the bucket.
5. Use the Data Policy drop down menu to change the data policy assigned to the bucket.
6. Click Save.
Use the instructions in this section to delete a bucket.
Caution: When you delete a bucket, all data contained in the bucket is lost. Any tapes associated with the bucket are marked as Free, and are available to the gateway for other storage operations immediately. Any bucket data that was written to tape media is retained until the tape is loaded into a drive and new data is written.
Note: You cannot delete a bucket created by the Spectra Vail, StorCycle, or RioBroker applications if the bucket contains data. To delete the bucket, use application that created the bucket to delete all data, then delete the bucket using the BlackPearl user interface.
1. From the menu bar, select Configuration > Buckets. The Buckets screen displays.
2. Select the bucket you want to delete and select Action > Delete. A confirmation dialog box displays.
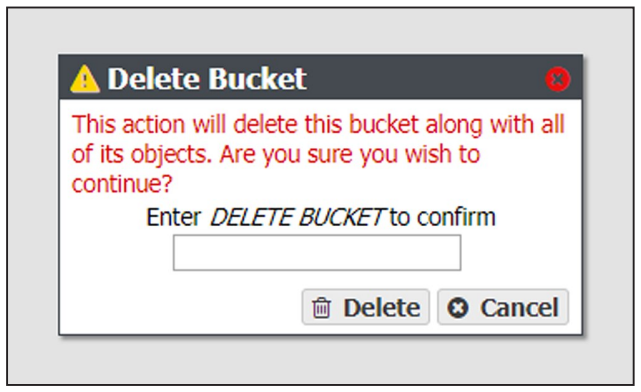
3. Type DELETE BUCKET into the entry field, and then click Delete.
¶ Manage a Storage Domain
Use the instructions in this section to edit or delete a storage domain member or a storage domain.
Use the instructions in this section to change the write preference for a storage domain member.
Note: For every storage domain, at least one storage domain member must have a write preference other than Never_Select.
1. From the menu bar, select Configuration > Advanced Bucket Management > Storage & Data Policy Management to display the Advanced Bucket Management screen.
2. Double-click the row for the storage domain with the storage domain member that you want to edit, or select the storage domain row and then select Action > Show Details. The Storage Domain details screen displays.
3. Select the storage domain member row and then select Action > Edit Storage Domain Member.
Note: Do not click the partition name when selecting the data persistence rule row or the Partition details screen will open.
The Edit Storage Domain Member dialog box displays.
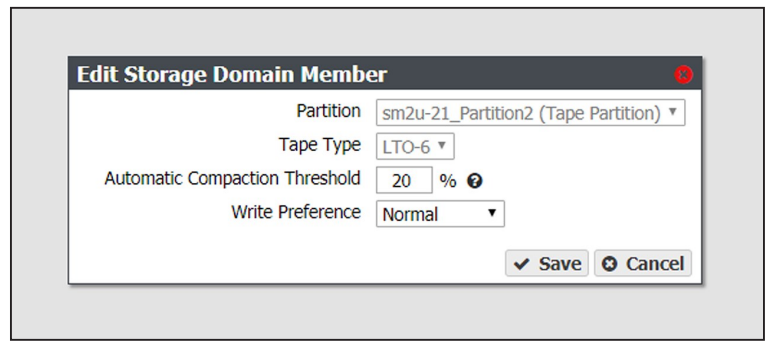
4. If desired, edit the percentage for the Automatic Compaction Threshold. Automatic compaction occurs when the percentage of deleted objects on a tape cartridge exceeds this value.
5. If desired, using the drop down menu, edit the Write Preference field as necessary.
Note: When editing a storage domain member, the Partition and Tape Type settings are unavailable.
6. Click Save. The edited storage domain member displays on the Storage Domain details screen.
Use the instructions in this section to exclude a storage domain member. This command migrates data off of the selected storage domain member before deleting the storage domain member
1. From the menu bar, select Configuration > Advanced Bucket Management > Storage & Data Policy Management to display the Advanced Bucket Management screen.
2. Double-click the row for the storage domain with the storage domain member that you want to exclude, or select the storage domain row and then select Action > Show Details. The Storage Domain details screen displays.
3. Select the desired storage domain member row and then select Action > Exclude Storage Domain Member.
Note: Do not click the partition name when selecting the data persistence rule row or the Partition details screen will open. The Exclude Storage Domain Member dialog box displays.
4. Type EXCLUDE in the entry field and then click Exclude.
1. From the menu bar, select Configuration > Advanced Bucket Management > Storage & Data Policy Management to display the Advanced Bucket Management screen.
2. Double-click the row for the storage domain with the storage domain member that is currently being excluded, or select the storage domain row and then select Action > Show Details. The Storage Domain details screen displays.
3. Select the desired storage domain member row and then select Action > Cancel Storage Domain Member Exclusion.
Note: Do not click the partition name when selecting the data persistence rule row or the Partition details screen will open.
The Cancel Storage Domain Member Exclusion dialog box displays
4. Type CANCEL in the entry field and then click Cancel.
Use the instructions in this section to delete a storage domain.
Notes:
- You cannot delete a storage domain member that has a tape or pool assigned to the storage domain.
- You cannot delete the last storage domain member of a storage domain assigned to a data policy.
1. From the menu bar, select Configuration > Advanced Bucket Management > Storage & Data Policy Management to display the Advanced Bucket Management screen.
2. Double-click the row for the storage domain with the storage domain member that you want to edit, or select the storage domain row and then select Action > Show Details. The Storage Domain details screen displays.
3. Select the storage domain member row and then select Action > Delete Storage Domain Member
Note: Do not click the partition name when selecting the data persistence rule row or the Partition details screen will open.
A confirmation dialog box displays.
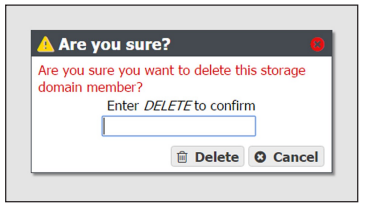
4. Type DELETE into the entry field, and then click Delete.
Use the instructions in this section to change the parameters for a storage domain
Important: If this storage domain is assigned to a data policy that uses versioning, after data is persisted, you cannot change this setting from Object ID to Object Name
Note: If an edit you select is not allowed, the gateway generates an error message when you click Save, explaining why the edit is not allowed.
- From the menu bar, select Configuration > Advanced Bucket Management > Storage & Data Policy Management to display the Advanced Bucket Management screen.
- Select the row for the storage domain that you want to edit and then select Action > Edit. The Edit storage domain screen displays .
Note: Alternatively, select Action > Edit Storage Domain from the storage domain details screen.
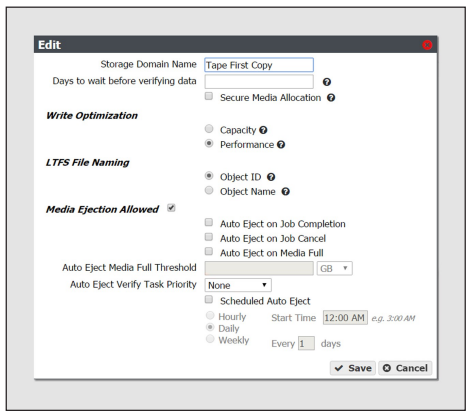
3. Edit the fields as necessary.
4. Click Save. The edited storage domain displays on the Advanced Bucket Management screen.
Use the instructions in this section to delete a storage domain.
Note: You cannot delete a storage domain if it is used by a data policy. See Delete a Data Replication Rule on page 113 for instructions on removing the storage domain from a data policy.
1. From the menu bar, select Configuration > Advanced Bucket Management > Storage & Data Policy Management to display the Advanced Bucket Management screen.
2. Select the row for the storage domain that you want to delete and then select Action > Delete. A confirmation dialog box displays.
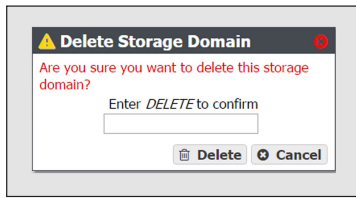
3. Type DELETE into the entry field, and then click Delete.
¶ Manage Data Replication Rules
Use the instructions in this section to change the type, data policy, or whether to replicate deletes, for a BlackPearl data replication rule.
Note: Some edits are restricted based on whether a bucket is currently using the data policy. If an edit is not allowed, an error message displays when you click Save.
1. From the menu bar, select Configuration > Advanced Bucket Management > Storage & Data Policy Management to display the Advanced Bucket Management screen.
2. Double-click the data policy with the BlackPearl data replication rule that you want to edit, or select the data policy and then select Action > Show Details. The Data Policy details screen displays.
3. Double-click the row of the BlackPearl data replication rule that you want to edit, or select the row for the replication rule and then select Action > Edit Rule.
Note: Do not click the target name when selecting the data persistence rule row or the Replication Targets screen will open.
The Edit BlackPearl Data Replication Rule dialog box displays.

4. The BlackPearl target name is unavailable and cannot be changed.
5. Edit the fields as necessary.
6. Click Save. The edited BlackPearl data replication rule displays on the Data Policy details screen.
Use the instructions in this section to change the type, Initial Data Placement, whether to Replicate Deletes, or the Max Blob Size for an Amazon S3 data replication rule.
Note: Some edits are restricted based on whether a bucket is currently using the data policy. If an edit is not allowed, an error message displays when you click Save.
1. From the menu bar, select Configuration > Advanced Bucket Management > Storage & Data Policy Management to display the Advanced Bucket Management screen.
2. Double-click the data policy with the Amazon S3 replication rule that you want to edit, or select the data policy and then select Action > Show Details. The Data Policy details screen displays.
3. Double-click the row of the Amazon S3 data replication rule that you want to edit, or select the row for the replication rule and then select Action > Edit Rule.
Note: Do not click the target name when selecting the data persistence rule row or the Replication Targets screen will open.
The Edit Amazon S3 Data Replication Rule dialog box displays.

4. The Amazon S3 target name is unavailable and cannot be changed.
5. Edit the fields as necessary.
Note: If you are configuring the replication to target a bucket that was previously created using the Amazon AWS interface, you must define a Lifecycle Management Rule in AWS to migrate data from the bucket default tier to the preferred tier, if necessary. Spectra Logic recommends using an immediate (0 days) move rule.
6. Click Save. The edited Amazon S3 data replication rule displays on the Data Policy details screen.
Use the instructions in this section to change the type, whether to Replicate Deletes, or the Max Blob Size for a Microsoft Azure data replication rule.
Note: Some edits are restricted based on whether a bucket is currently using the data policy. If an edit is not allowed, an error message displays when you click Save.
1. From the menu bar, select Configuration > Advanced Bucket Management > Storage & Data Policy Management to display the Advanced Bucket Management screen,
2. Double-click the data policy with the Microsoft Azure replication rule that you want to edit, or select the data policy and then select Action > Show Details. The Data Policy details screen displays.
3. Double-click the row of the Microsoft Azure data replication rule that you want to edit, or select the row for the replication rule and then select Action > Edit Rule.
Note: Do not click the target name when selecting the data persistence rule row or the Replication Targets screen will open.
The Edit Microsoft Azure Data Replication Rule dialog box displays.

4. The Microsoft Azure target name is unavailable and cannot be changed.
5. Edit the fields as necessary
6. Click Save. The edited Microsoft Azure data replication rule displays on the Data Policy details screen.
Use the instructions in this section to delete a data replication rule for any type of target from a data policy.
Note: You cannot delete a data replication rule if the data policy is used by a bucket.
1. From the menu bar, select Configuration > Advanced Bucket Management > Storage & Data Policy Management to display the Advanced Bucket Management screen.
2. Double-click the data policy with the replication rule that you want to delete, or select the data policy and then select Action > Show Details. The Data Policy details screen displays.
3. Select the row for the replication rule and then select Action > Delete Rule.
Note: Do not click the target name when selecting the data persistence rule row or the Replication Targets screen will open.
A confirmation dialog box displays.
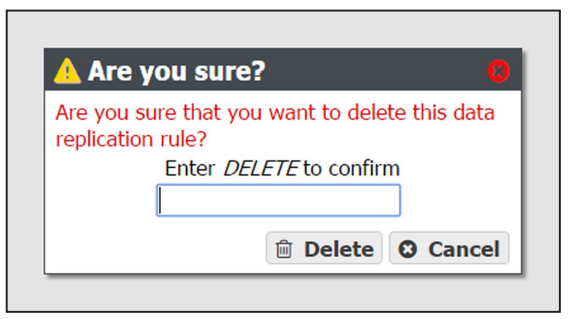
4. Type DELETE into the entry field, and then click Delete.
¶ Manage Data Policy
Use the instructions in this section to edit a data policy.
Important: If you previously configured the data policy Versioning setting to Keep Multiple Versions, you are not able to change this setting after the data policy was created.
Note: If an edit you selected is not allowed, the gateway generates an error message, when you click Save, explaining why the edit is not allowed. For example, you cannot change the Checksum type if the data policy is used by a bucket.
1. From the menu bar, select Configuration > Advanced Bucket Management > Storage & Data Policy Management to display the Advanced Bucket Management screen.
2. Select the row for the data policy that you want to edit and then select Action > Edit. The Edit Data Policy screen displays.
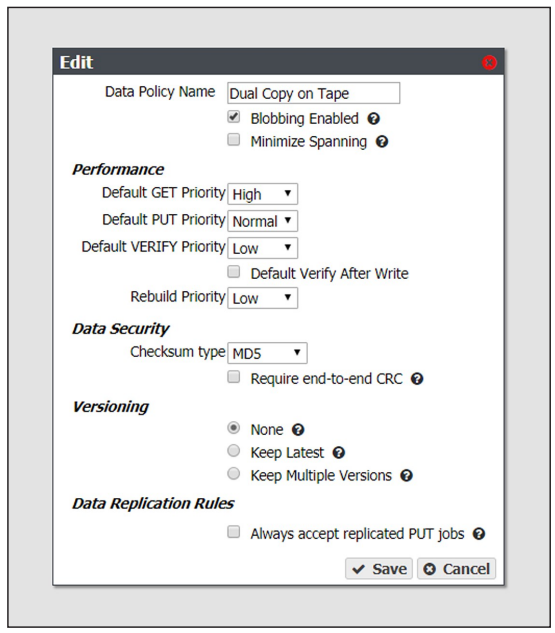
3. Edit the fields as necessary.
4. Click Save. The edited data policy displays on the Advanced Bucket Management screen.
Use the instructions in this section to delete a data policy.
Note: You cannot delete a data policy if any buckets exist that use the specified data policy.
1. From the menu bar, select Configuration > Advanced Bucket Management > Storage & Data Policy Management to display the Advanced Bucket Management screen.
2. Select the row for the data policy that you want to delete and then select Action > Delete. A confirmation dialog box displays.
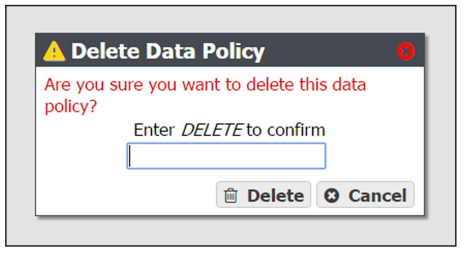
3. Type DELETE into the entry field, and then click Delete.
Use the instruction in this section to delete a data policy ACL.
1. From the menu bar, select Configuration > Advanced Bucket Management > Storage & Data Policy Management to display the Advanced Bucket Management scree.
2. Select the row for the data policy for which you want to delete an ACL, then select Action > Show Details. The Data Policy details screen displays.
3. Select the row for the data policy ACL which you want to delete.
4. From the menu bar, select Action > Delete Data Policy ACL. A confirmation window displays.
5. Click Delete.
Use the instructions in this section to change the type, Isolation Level, or Minimum Days to Retain for a data persistence rule.
Note: Some edits are restricted based on whether a bucket is currently using the data policy. If an edit is not allowed, an error message displays when you click Save.
1. From the menu bar, select Configuration > Advanced Bucket Management > Storage & Data Policy Management to display the Advanced Bucket Management screen.
2. Double-click the data policy with the persistence rule that you want to edit, or select the data policy and then select Action > Show Details. The Data Policy details screen displays.
3. Double-click the row of the persistence rule that you want to edit, or select the row for the persistence rule and then select Action > Edit Rule. Note: Do not click the storage domain name when selecting the data persistence rule row or the Storage Domain details screen will open.
The Edit Data Persistence Rule dialog box displays.
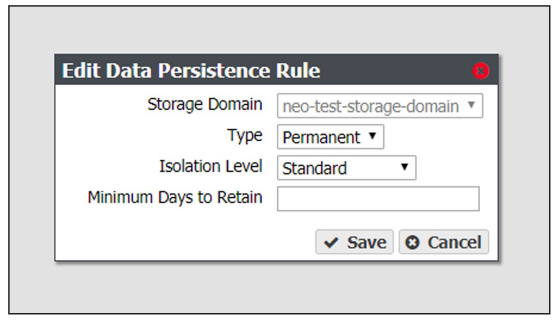
4. The Storage Domain setting is unavailable and cannot be changed.
5. Edit the fields as necessary. S
6. Click Save. The edited data persistence rule displays on the Data Policy details screen.
Use the instructions in this section to delete a data persistence rule from a data policy
Important: Deleting a persistence rule deletes all data associated with the rule
Notes:
- You cannot delete a data persistence rule if the data policy is used by a bucket.
- You cannot delete a persistence rule if it is the last permanent persistence rule for a data policy.
1. From the menu bar, select Configuration > Advanced Bucket Management > Storage & Data Policy Management to display the Advanced Bucket Management screen.
2. Double-click the data policy with the persistence rule that you want to delete, or select the data policy and then select Action > Show Details. The Data Policy details screen displays.
3. Select the row for the persistence rule and then select Action > Delete Rule.
Note: Do not click the storage domain name when selecting the data persistence rule row or the Storage Domain details screen will open.
A confirmation dialog box displays.
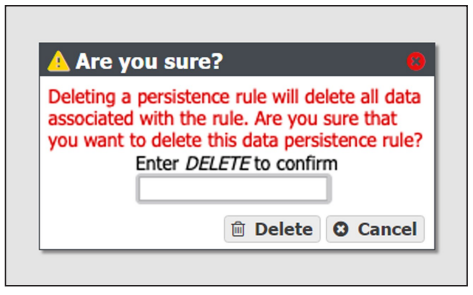
4. Type DELETE into the entry field, and then click Delete.
¶ Manage Replication Targets
Use the instruction in this section to manage existing replication targets.
1. From the menu bar, select Configuration > Advanced Bucket Management > Replication Targets to display the Replication Targets screen.
2. Double-click the BlackPearl replication target that you want to edit, or select the replication target and then select Action > Edit. The Edit BlackPearl Target dialog box displays.

3. Edit the fields as necessary.
4. Click Save. The edited BlackPearl replication target displays on the Replication Targets screen.
Use the instructions in this section to modify the configuration of an existing Amazon replication target.
1. From the menu bar, select Configuration > Advanced Bucket Management > Replication Targets to display the Replication Targets screen.
2. Double-click the Amazon replication target that you want to edit, or select the replication target and then select Action > Edit. The Edit Amazon S3 Target dialog box displays.
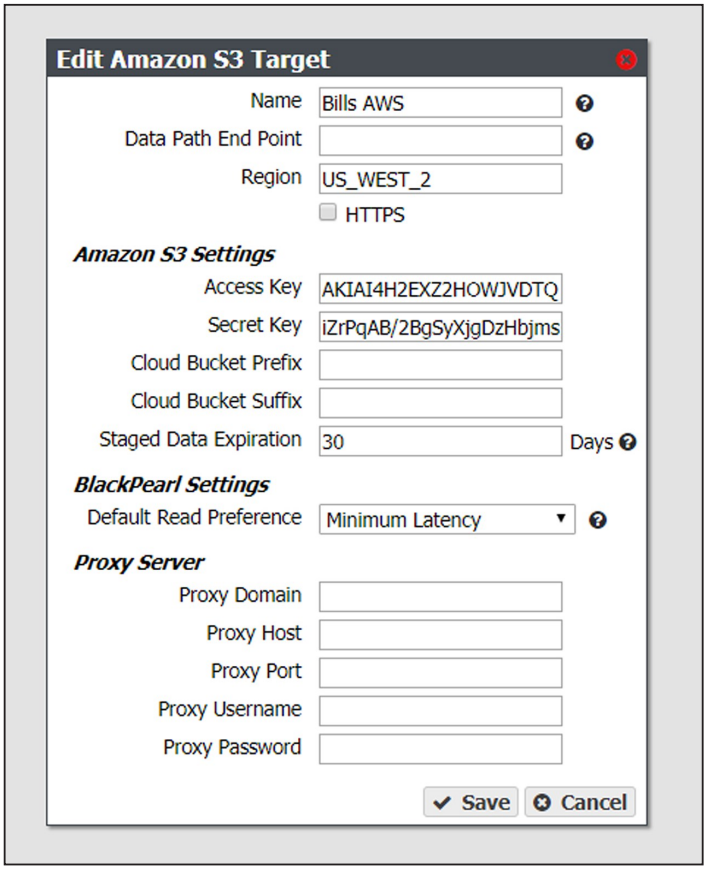
3. Edit the fields as necessary.
4. Click Save. The edited Amazon replication target displays on the Replication Targets screen.
Use the instructions in this section to modify the configuration of an existing Azure replication target.
1. From the menu bar, select Configuration > Advanced Bucket Management > Replication Targets to display the Replication Targets screen.
2. Double-click the Azure replication target that you want to edit, or select the replication target and then select Action > Edit. The Edit Microsoft Azure Target dialog box displays.
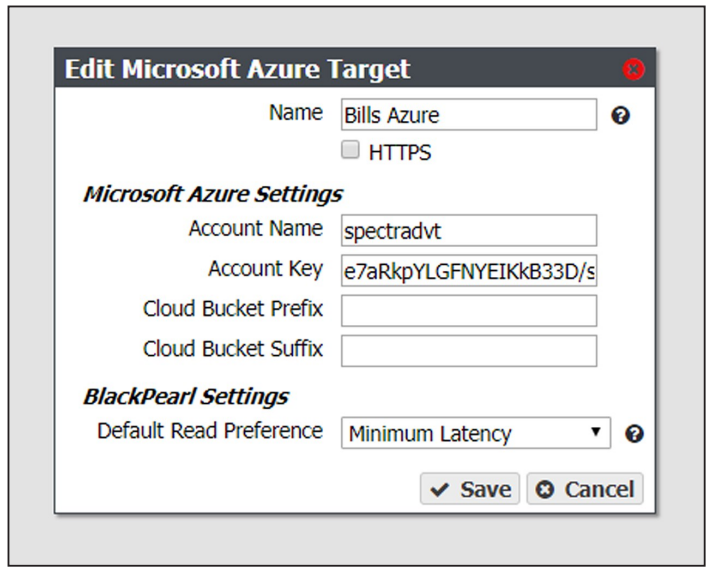
3. Edit the fields as necessary.
4. Click Save. The edited Azure replication target displays on the Replication Targets screen.
Use the instructions in this section to verify connectivity to the target and optionally verify replicated data on the replication target.
1. From the menu bar, select Configuration > Advanced Bucket Management > Replication Targets to display the Replication Targets screen.
2. Double-click the replication target for which you want to verify connectivity, or select the replication target and then select Action > Verify Data. The Verify target type Target dialog box displays.
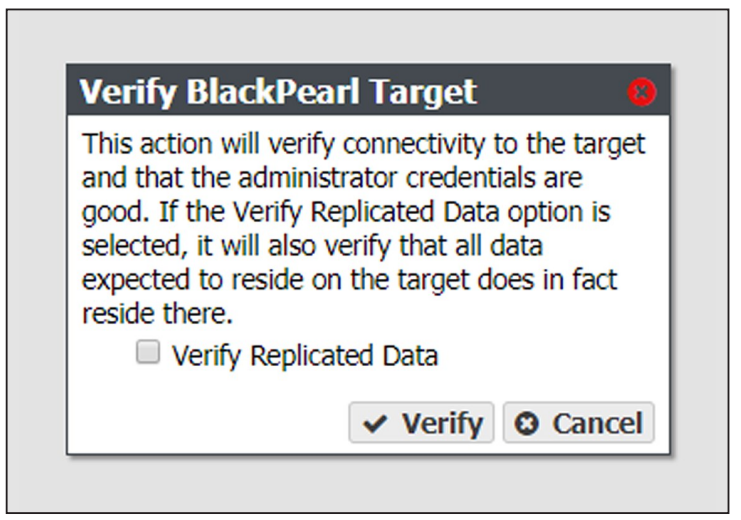
3. If desired, select Verify Replicated Data to confirm that the expected data resides on the replication target.
Note: Depending on the amount of data on the replication target, this process may take a long time to complete.
4. Click Verify. The gateway confirms connectivity to the target and optionally verifies the replicated data.
If you need to perform service on a replication target, it is recommended that you first put the replication target into a standby state. Otherwise, the BlackPearl gateway may attempt to use the target while it is in service.
Use the instructions in this section to place a replication target into a standby state. No data is transferred to the replication target while in standby.
1. From the menu bar, select Configuration > Advanced Bucket Management > Replication Targets to display the Replication Targets screen.
2. Select the replication target that you want to put into standby and then select Action > Put Target in Standby. The Put Target in Standby dialog box displays.

3. Click Deactivate. The target is now in standby.
Use the instructions in this section to activate a replication target currently in standby. Once activated, data transfers are allowed to the replication target.
1. From the menu bar, select Configuration > Advanced Bucket Management > Replication Targets to display the Replication Targets screen.
2. Select the replication target that you want to activate and then select Action > Activate Target. The Activate Target dialog box displays.

3. Click Activate. The target is now in an active state.
Use the instructions to delete an existing replication target.
Caution: If you delete a replication target, all data on the target is deleted.
Note: You cannot delete a replication target if it is used by a data policy.
1. From the menu bar, select Configuration > Advanced Bucket Management > Replication Targets to display the Replication Targets screen.
2. Select the replication target that you want to delete and then select Action > Delete. The Delete target type Target dialog box displays.
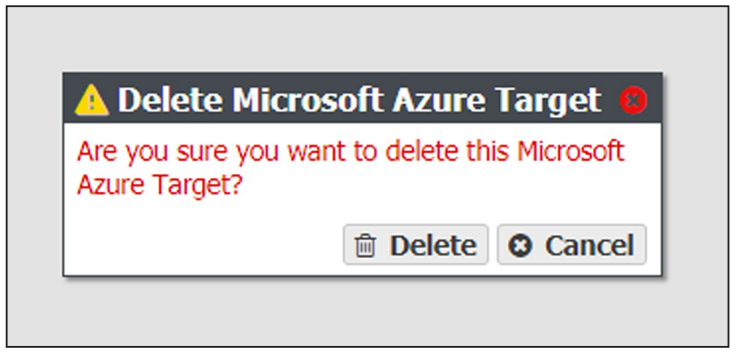
3. Click Delete to delete the selected replication target.
¶ Manage Disk Partition
Use the instructions in this section to change the parameters for a disk partition.
Notes:
- You cannot remove a member pool that contains data.
- You cannot remove the last member pool of a disk partition assigned to a storage domain.
1. From the menu bar, select Configuration > Advanced Bucket Management > Storage & Data Policy Management to display the Advanced Bucket Management screen.
2. Select the disk partition row and then select Action > Edit. The Edit Disk Partition dialog box displays.
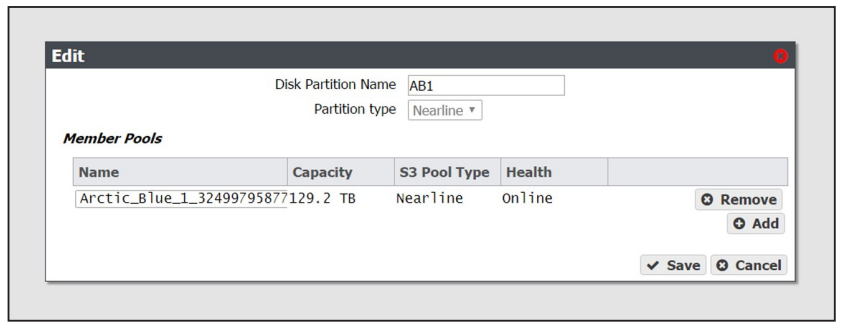
3. Edit the fields as necessary.
4. Click Save. The edited disk partition displays on the Advanced Bucket Management screen.
Use the instructions in this section to delete a disk partition.
Note: You cannot delete a disk partition that is a member of any storage domain
1. From the menu bar, select Configuration > Advanced Bucket Management > Storage & Data Policy Management to display the Advanced Bucket Management screen.
2. Select the row of the disk partition you want to delete and then select Action > Delete. A confirmation dialog box displays.

3. Type DELETE into the entry field, and then click Delete.
¶ Special Considerations for Exporting Tapes
If you plan to export tapes, Spectra Logic recommends the following storage domain and data policy settings:
- Set the Write Optimization setting to Capacity when configuring a storage domain so that data is written to as few tapes as possible.
- Enable Bucket Isolation when configuring a data policy. This setting configures the bucket to have its own unique set of tapes. This ensures that tape media containing one bucket of information is not mixed with another bucket, making it easier to export a bucket.
¶ Manage Online and Nearline Disk Pools
Data present on storage pools on expansion nodes can be moved from one BlackPearl gateway to another, either to increase name space redundancy, or as part of disaster prevention. Use the instructions in this section to import a pool.
1. Ensure the expansion node containing the pool you want to import is cabled to the BlackPearl gateway master node.
2. Ensure the settings for the DS3 service Default Conflict Resolution Mode are set to your preference.
3. From the menu bar, select Configuration > Advanced Bucket Management > Storage & Policy Management to display the Advanced Bucket Management screen.
4. Disk pools eligible for import display with a health of Foreign. Select the nearline pool you want to import in the Storage Pools pane, and select Action > Import Pool. The Import dialog box displays.
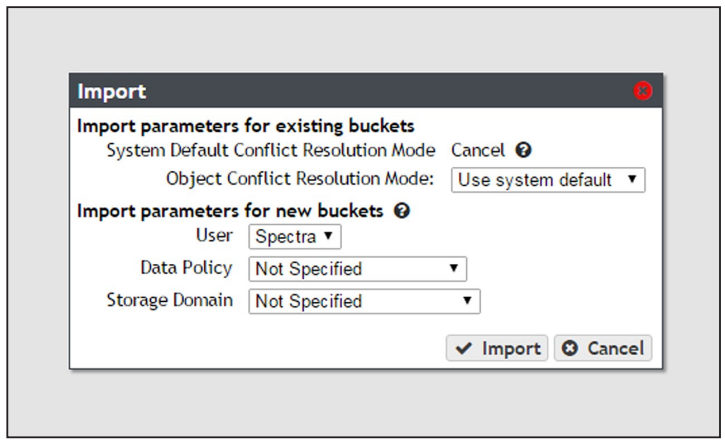
5. Configure the import parameters for existing buckets present on the storage pool.
a. The System Default Conflict Resolution Mode is configured when editing the DS3 service and is not editable in this dialog box. See Configure the DS3 Service for more information.
b. Using the drop-down menu, select a behavior for Object Conflict Resolution Mode. This setting configures how the gateway handles a file name conflict when importing foreign objects on the storage pool to an existing bucket.
| Value | Description |
| Use system default | The gateway uses the behavior displayed in the System Default Conflict Resolution Mode row of the Import dialog box. |
| Cancel | Abort the import process if a file name conflict is discovered. |
| Accept Most Recent | Keep the file with the most recent creation date. |
| Accept Existing | Keep the file currently in the BlackPearl database. |
6. Configure the import parameters for new buckets present on the storage pool.
a. Using the drop-down menu, select the User to be the owner of the imported bucket (s).
b. Using the drop-down menu, select the Data Policy to use for the imported bucket (s).
c. Using the drop-down menu, select the Storage Domain to use for the imported bucket(s).
7. Click Import.
If you want to delete an online or nearline disk pool (for example, to create a larger pool after adding additional disks to the gateway) use the instructions in this section to delete a disk pool.
Note: You must delete all objects contained in the disk pool before you can delete the pool.
1. From the menu bar, select Configuration > Advanced Bucket Management > Storage & Policy Management to display the Advanced Bucket Management screen.
2. Select the pool you want to delete in the Storage Pools pane, and select Action > Delete. A confirmation dialog box displays.
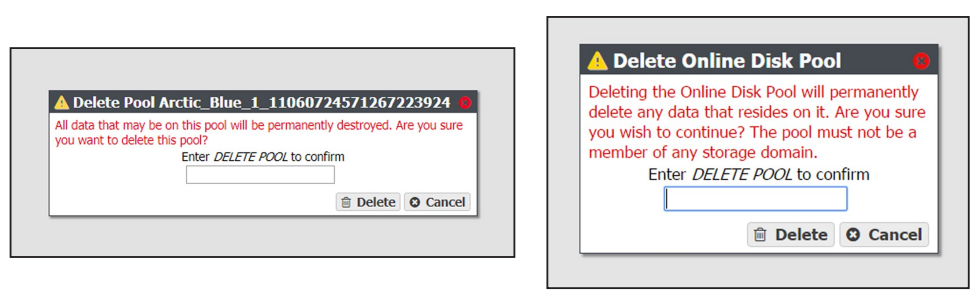
3. Enter DELETE POOL into the entry field and click Delete. The disk pool is deleted.
¶ Change BlackPearl Cache Configuration