¶ NAS Replication
If the BlackPearl NAS solution is on a network with Verde arrays, other BlackPearl NAS solutions, or BlackPearl gateways with NAS enabled, you can select to replicate data from the NAS volumes on the solution to one or multiple NAS replication targets. Replication uses the same data interface that the solution uses for normal file storage operations, so replication to multiple targets may decrease transfer speeds.
This feature also allows you to easily transfer snapshot data stored on NAS volumes to a remote BlackPearl gateway. These snapshots can be retained for archival purposes or restored on the target solution to replicate the data contained in the snapshot.
Once you configure the replication service, you need to configure each volume on the solution that you want to replicate. Use the instructions in this section to configure the replication service and to configure volumes for replication.
¶ Configure NAS Replication
Use the instruction in this section to configure the NAS replication service.
1. In the source solution’s BlackPearl user interface, select Configuration > Services to display the Services screen
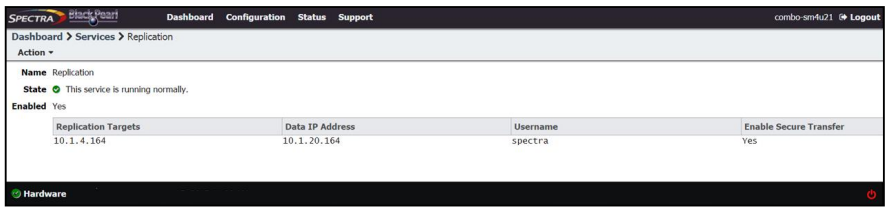
2. Double-click the Replication service, or select the service, and then select Action > Show Details. The Replication service details screen displays.
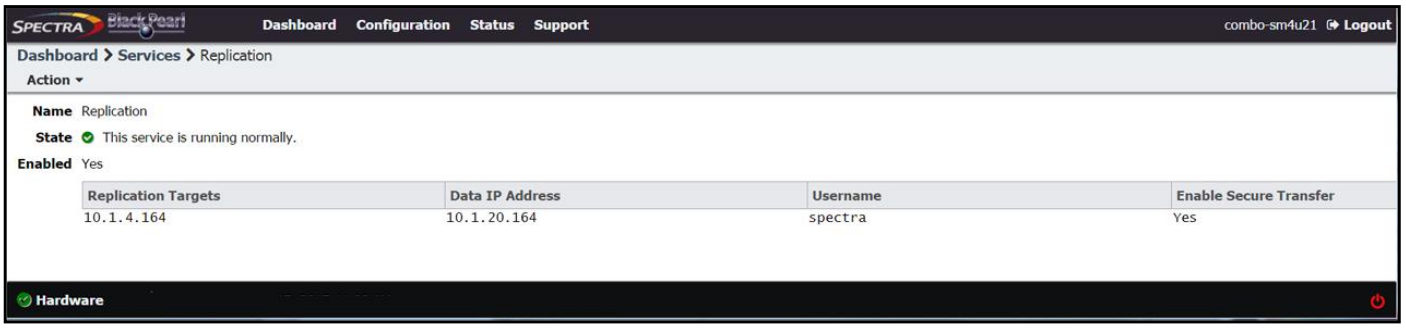
3. Select Action > Create. The Add Replication Target dialog box displays.
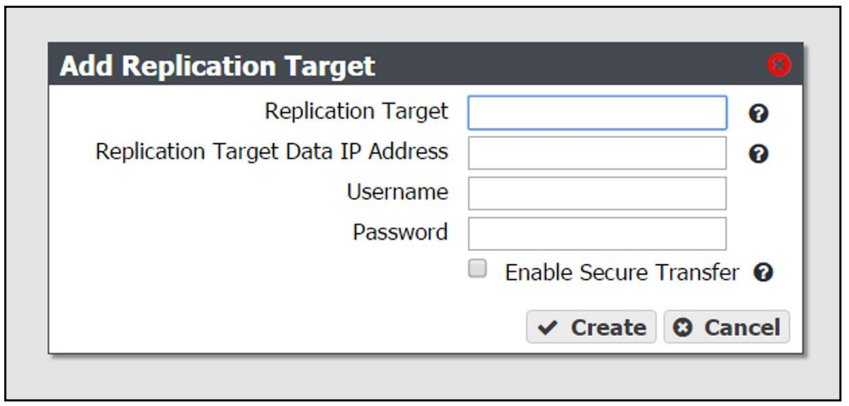
4. Enter the IP address or hostname of the target’s management port in the Replication Target field.
Note: Do not use http:// or https:// to precede the IP address or hostname.
5. Enter the IP address of the target’s data port in the Replication Target Data IP Address field.
Note: Do not use http:// or https:// to precede the IP address or hostname.
6. Enter the username of a user with administrator privileges configured on the target in the Username field.
Note: Replications fail if the user account on the target system is configured to use multi-factor authentication.
7. Enter the user password in the Password field, if one is set. Otherwise, leave the field blank.
8. Select the Enable Secure Transfer check box to configure the solution to encrypt the replicated data before transferring it to the target. Data is encrypted using Secure Socket Layer (SSL).
9. Click Save.
If you have not already done so, use the instructions below to create a disk pool and volume to be the target for the replication.
1. Log into the BlackPearl on the target system
2. Create one or more storage pools
3. Create one or more volumes. You must create one volume on the target system for each volume you want to replicate on the source system.
Caution: You cannot use this volume for normal data storage operations, it can only be used as a replication target. Any data in the specified target volume is deleted each time the source system replicates data to the target system.
Caution: You cannot use this volume for normal data storage operations, it can only be used as a replication target. Any data in the specified target volume is deleted each time the source system replicates data to the target system.
1. In the source solution’s BlackPearl user interface, select Configuration > NAS > Volumes. The Volumes screen displays.
2. Double-click the volume name you want to configure to replicate, or select the volume and select Action > Show Details. The details screen for the volume displays.
3. Select Action > Configure Replication. The Configure Replication dialog box displays
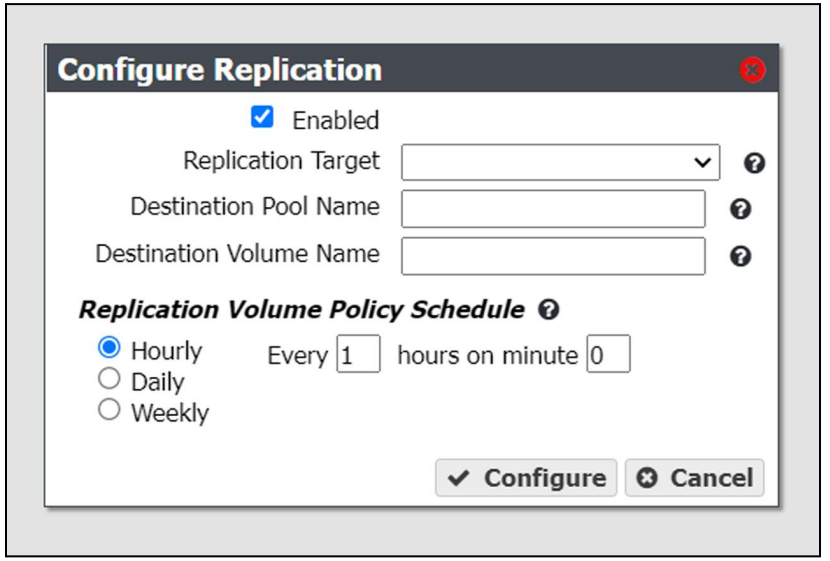
4. Select the Enabled check box. The options below are unavailable and not configurable until this check box is selected.
Note: Do not use http:// or https:// to precede the IP address or hostname.
5. Select the Replication Target from the drop-down menu. The targets are listed by the IP address or hostname. If you only configured the solution to replicate to a single target, the target is preselected.
6. Enter the name of the storage pool on the target you want to use for replication in the Destination Pool Name. This field is case sensitive.
7. Enter the name of a volume that resides on the target storage pool you selected in Step 6 in the Destination Volume Name field, or enter the name for a new volume to be created on the specified storage pool. This field is not case sensitive.
Caution: You cannot use this volume for normal data storage operations, it can only be used as a replication target. Any data in the specified target volume is deleted each time the solution replicates data to the target.
Caution: You cannot use this volume for normal data storage operations, it can only be used as a replication target. Any data in the specified target volume is deleted each time the solution replicates data to the target.
- If the volume does not exist on the target, it is created.
- If the volume exists on the target, a warning message displays informing you that any data currently in the target volume is erased each time data is replicated. Confirm the warning message to continue.
8. Select the Hourly, Daily, or Weekly radial button for the Replication Volume Policy Schedule. The dialog box changes to show the configuration options for your selection. Continue to create replication schedule.
Creating an hourly schedule for NAS replication is helpful in the case of a ransomware attack. With an hourly snapshot schedule, only data written in the last hour or less can be compromised by the ransomware attack. Data older than one hour can be restored from the most recent snapshot.
1. Select Hourly as the interval for the replication schedule (see Figure 51 on page 100).
2. Enter numbers for Every _ hours on minute _. These values specify the interval in hours between replicating data and the number of minutes after the top of the hour when the job starts. For example, if the values are set to 4 and 15, the data is replicated every four hours at 15 minutes after the hour. The maximum setting for the hours field is 48, where the data replicates every two days. The maximum setting for the minute field is 59.
Note: Spectra Logic recommends offsetting the minutes after the hour for starting replications so that there are not a large number of jobs starting at exactly the same time.
3. Click Create.
1. Select Daily as the interval for the replication schedule. The dialog box changes to display options for the daily interval setting.
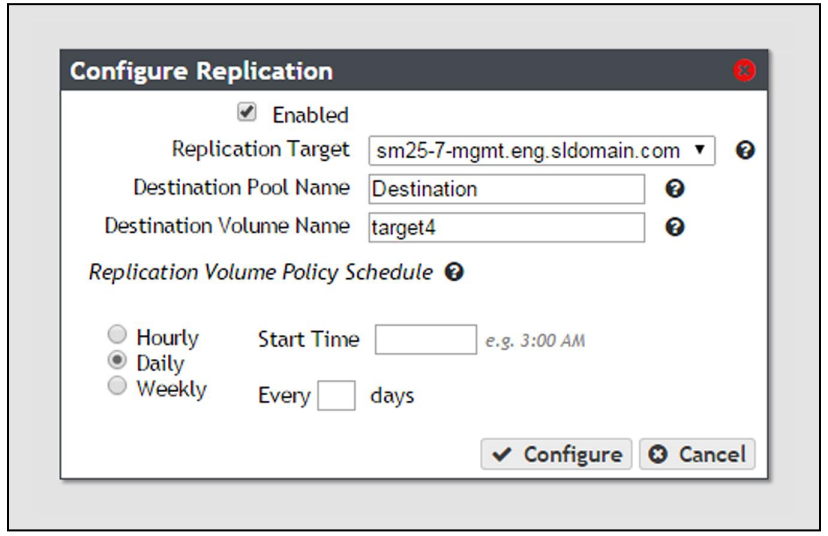
2. Enter a time value for Start Time, and include AM or PM after the value. This field is not case sensitive.
3. Enter a number for Every _ days. This value specifies the interval, in days, between data replications. The value entered is enumerated from the first day of the month. The schedule resets at the beginning of each month. For example, if this value is set to 2, the NAS volume replicates data every two days, starting with the 1st of the month, at the time specified in Step 2. A value of 30 runs on the 1st of the month, and then again on the 31st of the month (for months that have 31 days). To schedule data replication on the first of every month, set the interval to 31 days.
4. Click Create.
1. Select Weekly as the interval for the replication schedule. The dialog box changes to display options for the weekly interval setting.
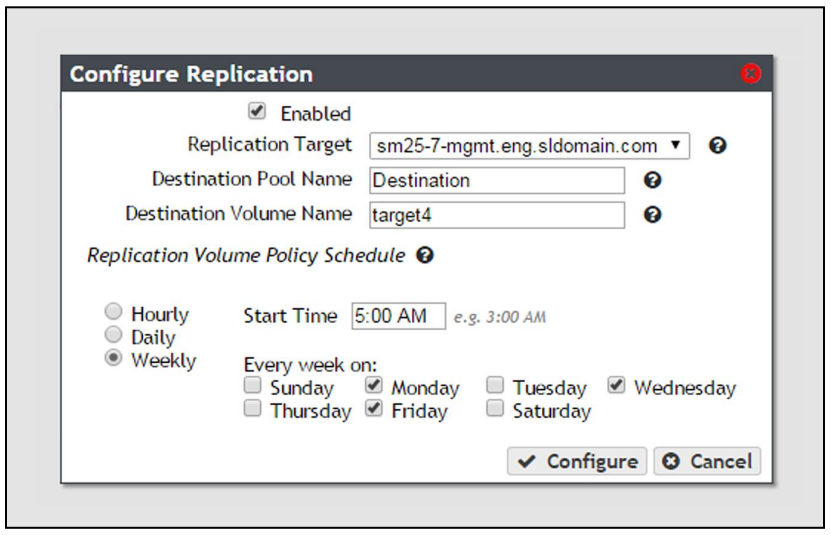
2. Enter a time value for Start Time, and include AM or PM after the value. This field is not case sensitive.
3. Select one or more days for Every week on:. This determines the day(s) of each week the NAS volume replicates data. For example, based on the selections in the image above, the NAS volume replicates data every Monday, Wednesday, and Friday at 5:00 AM.
4. Click Create.
¶ Manage NAS Replication
After configuring replication , use the instructions in this section to manually start or cancel a volume replication, edit or delete the NAS replication configuration, and to restore replicated files.
If desired, you can initiate volume replication manually, regardless of the automatic replication schedule configured for the volume. Starting a manual NAS replication begins the replication immediately. Once complete, replication for the volume continues on its previously defined schedule.
Note: If the solution is in the process of replicating data on a preconfigured schedule, the manual replication begins when the scheduled replication completes. To stop any replication in progress, see Cancel a NAS Replication In Progress below.
1. On the source system’s BlackPearl user interface, select Configuration > NAS > Volumes. The Volumes screen displays.
2. Double-click the volume name you want to replicate, or select the volume and select Action > Show Details. The details screen for the volume displays.
3. Select Action > Replicate Now. A confirmation window displays.
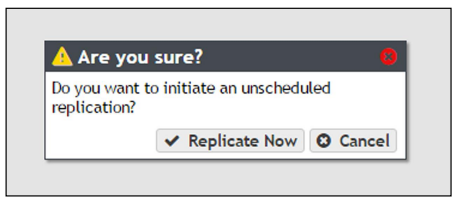
4. Click Replicate Now to begin a manual NAS replication.
If desired, you can cancel any NAS replications currently in progress. Canceling replication stops the replication and deletes any data the target received during the replication. Use the steps in this section to cancel a NAS replication.
Note: Starting with BlackPearl OS 5.4, you can no longer cancel an in-progress NAS replication. After starting a NAS replication, you must wait for it to complete.
1. On the source system’s BlackPearl user interface, select Configuration > NAS > Volumes. The Volumes screen displays.
2. Double-click the volume name for which you want to cancel replication, or select the volume and select Action > Show Details. The details screen for the volume displays.
3. Select Action > Cancel Replication. A confirmation window displays.
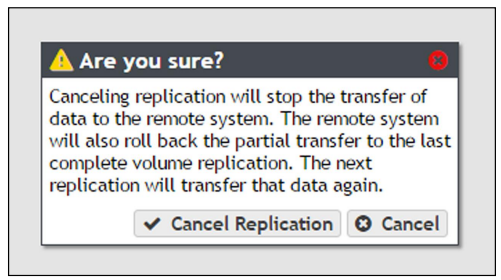
4. Click Cancel Replication to stop the NAS replication in progress. Any data that was transferred to the target is deleted.
If the source solution in a NAS replication configuration fails, you can restore files from the replication target. Use the instructions in this section to restore files from a NAS replication target.
1. On the source system’s BlackPearl user interface, clear the write-protected status of the replicated volume.
Note: You cannot add a share while the volume has write-protection enabled.
a. From the menu bar, select Configuration > NAS > Volumes. The Volumes screen displays.
b. Select the replicated volume and select Action > Edit. The Edit volume name dialog box displays.
c. Clear the Read Only check box.
d. Click Save.
2. Depending on your operating system environment, create either a CIFS or NFS share, selecting the replicated volume during the creation process.
3. If desired, write protect the replicated volume before you copy files from the volume.
Note: Spectra Logic highly recommends that you write-protect the volume after sharing it.
a. From the menu bar, select Configuration > NAS > Volumes. The Volumes screen displays.
b. Select the replicated volume and select Action > Edit. The Edit volume name dialog box displays.
c. Select the Read Only check box.
d. Click Save.
4. Using your host machine, connect to the new share on the replication target.
5. Copy the needed files from the replication target share to the source solution.
6. If desired, stop sharing the NAS replication target volume.
Use the instructions in this section to prevent any further replication from a volume currently configured to use NAS replication
1. On the source system’s BlackPearl user interface, select Configuration > NAS > Volumes. The Volumes screen displays.
2. Double-click the volume name you want to stop replicating, or select the volume and select Action > Show Details. The details screen for the volume displays.
3. Select Action > Configure Replication. The Configure Replication dialog box displays.
4. Clear the Enabled check box. The other options on the dialog box grey out and become un-editable.
5. Click Configure. The volume no longer replicates to the target.
1. On the source solution’s BlackPearl user interface, select Configuration > Services to display the Services screen
2. Double-click the Replication service, or select the service, and then select Action > Show Details. The Replication service details screen displays.
3. Select the replication target in the Replication service details screen, and select Action > Edit. The Modify Replication Service dialog box displays.
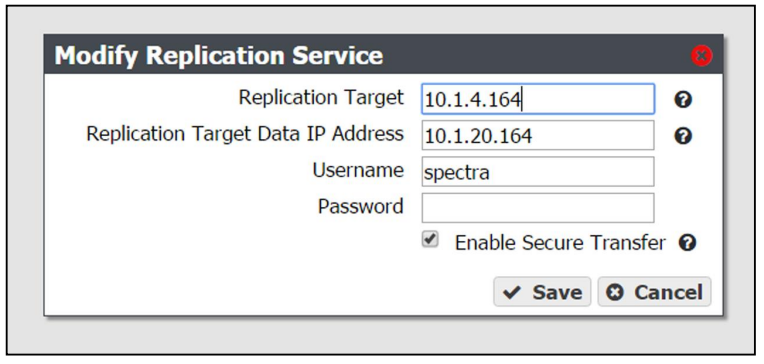
4. If desired, modify the IP address or hostname of the management port of the target in the Replication Target field.
Note: Do not use http:// or https:// to precede the IP address or hostname.
5. If desired, modify the IP address of the target’s data port in the Replication Target Data IP Address field.
Note: Do not use http:// or https:// to precede the IP address or hostname.
6. If desired, modify the username of a user configured on the target in the Username field.
7. Enter the user password in the Password field, if one is set. Otherwise, leave the field blank.
8. If desired, select the Enable Secure Transfer check box to configure the solution to encrypt the replicated data before transferring it to the target, or clear the check box to transfer data without encryption. Data is encrypted using Secure Socket Layer (SSL).
9. Click Save.
1. On the source solution’s BlackPearl user interface, select Configuration > Services to display the Services screen.
2. Double-click the Replication service, or select the service, and then select Action > Show Details. The Replication service details screen displays.
3. Select the replication target in the Replication service details screen, and select Action > Delete. The Delete Replication Target dialog box displays.
4. Click Delete to remove the NAS replication target. The solution no longer replicates data to the target.
5. Repeat Step 3 and Step 4 to delete additional NAS replication targets, if desired.