¶ CIFS & NFS Shares
After you create one or more volumes, you can share a volume using either the NFS or CIFS service. Decide which method to use for sharing and follow the appropriate instructions below.
¶ CIFS Share
Spectra Logic recommends using Active Directory to control access to CIFS shares on the BlackPearl NAS solutions.
However, if your Windows operating system environment does not use Active Directory, you can enable local administrator status on the solution to allow a specified user to access the CIFS shares in a Windows workgroup environment. The username and password configured on the BlackPearl NAS solution are used to access the CIFS shares when using a Windows workgroup environment.
¶ Join an Active Directory Domain
If your Windows environment uses Active Directory, you must join an Active Directory domain before creating a CIFS share.
¶ Enable Local Administrator Status
If your Windows environment does not use Active Directory, you must edit a user to enable local administrator status.
Note: Alternatively, you can create a new user with local administrator status.
¶ Configure Users
From the menu bar, select Configuration > Users. The Users screen displays.
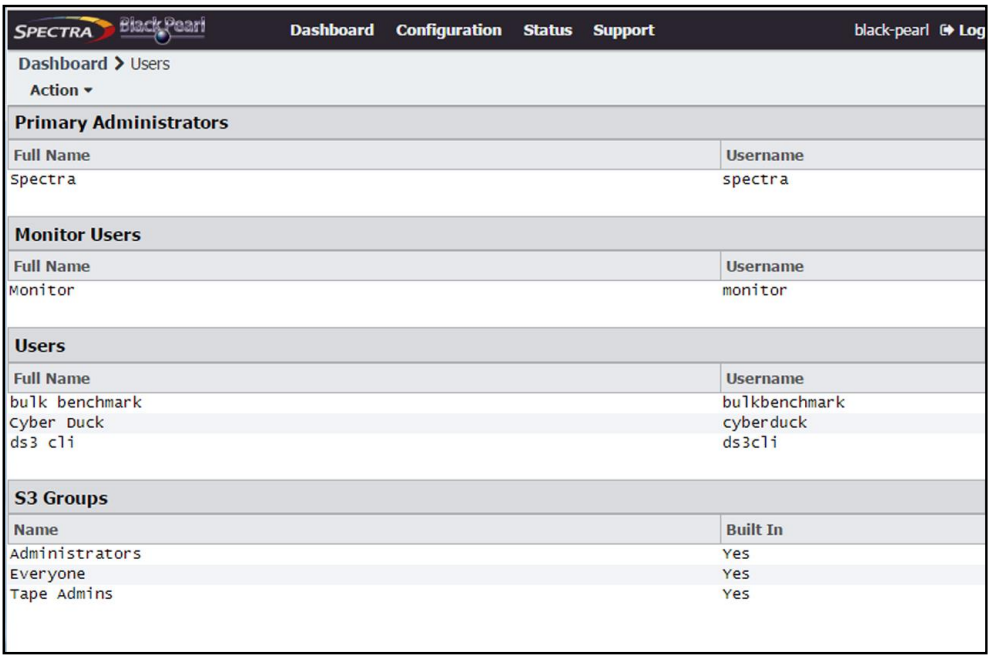
2. Double-click the row for the user for which you want to enable local administrator status, or select the user, and then select Action > Edit. The Edit User dialog box displays.
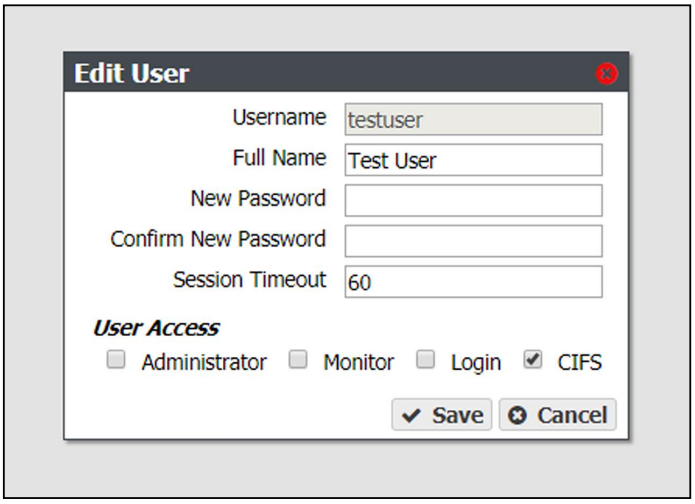
3. Select the CIFS checkbox to enable the user to access CIFS shares in a Windows workgroup environment.
If desired, change other settings.
Click Save
¶ Create a CIFS Share
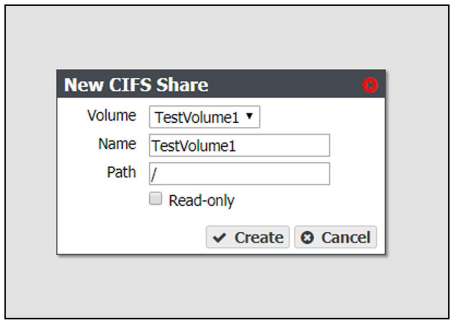
1. From the menu bar, select Configuration > NAS > Shares > CIFS. The CIFS Shares screen displays.

|
2. Select Action > New. The New CIFS Share dialog box displays to show the options for creating a new share. 3. Use the drop-down menu to select the Volume you want to share. Note: Creating a CIFS share on a case-sensitive volume reduces performance 4. Set the Name for the CIFS share. This is the name that is displayed in Active Directory configurations. 5. The network address displayed for Path is the address of the share you are currently configuring. The default path allows access to the root of the volume. Notes:
6. If desired, select Read-only to configure the CIFS share as read only. 7. Click Create to finish |
 |
When a CIFS share is created, the default permission is “Everyone”. This allows the user creating the initial shares to easily set the proper permissions for additional users without requiring the Active Directory Domain administrator password.
1. Mount the new CIFS share to your Microsoft Windows operating system host.
2. Using Windows Explorer, right-click on the CIFS share, and select Properties. The General tab of the Properties window displays.
Note: You cannot use the Computer Management panel to set permissions on CIFS shares.

3. Click Security. The Security tab displays
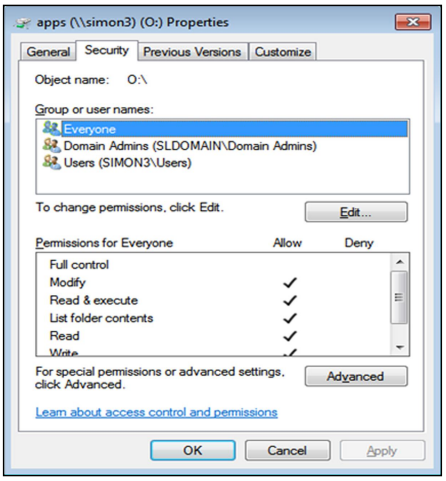
4. Add, or remove users, or modify permissions for users as needed for your storage environment.
5. Click Ok
Note: Starting with BlackPearl OS 5.4, if you remove the "Everyone" group permission in Windows, you must log out of Windows, and then log in again for the change to take effect.
After creating a CIFS share, you can edit it to change the configuration.
1. From the menu bar, select Configuration > Shares > CIFS. The CIFS Shares screen displays.
2. Select the share you want to edit, and then select Action > Edit. The Edit CIFS Share screen displays.
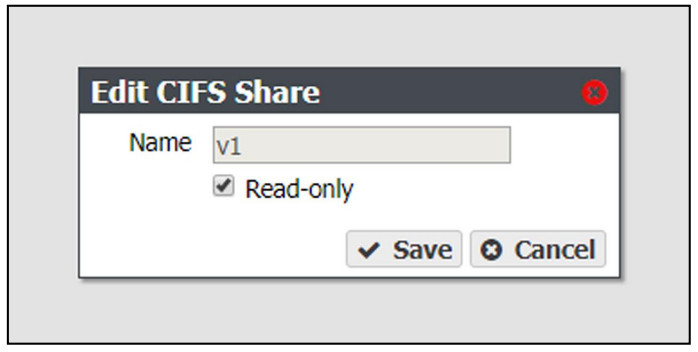
3. Select or clear the Read-only check box. You cannot change the name once the CIFS share is created.
4. Click Save.
If you do not want to continue sharing a volume (that is, you do not want users accessing the NAS over a network connection to access the volume), you can delete the share.
Use the following steps to delete the share.
1. If you need to delete a CIFS share, from the menu bar, select Configuration > Shares > CIFS. The CIFS Shares screen displays.
—OR—
If you need to delete an NFS share, from the menu bar, select Configuration > Shares > NFS. The NFS Shares screen displays.
—OR—
If you need to delete a Vail share, from the menu bar, select Configuration > Shares > Vail S3. The Vail S3 Shares screen displays.
2. Select the share you want to delete, and then select Action > Delete.
Note: You cannot delete a Vail S3 share with data persisted to the volume. You must first delete the share as Storage in the Vail management console, then delete the share in the BlackPearl user interface.
3. A dialog box displays asking you to confirm the deletion. Click Delete to remove the share.
Note: Clicking Delete does not delete the volume. It only removes the volume from the list of shares and makes it inaccessible to remote hosts. The volume is still listed present on the solution and listed on the Volumes screen.
¶ Create NFS Share
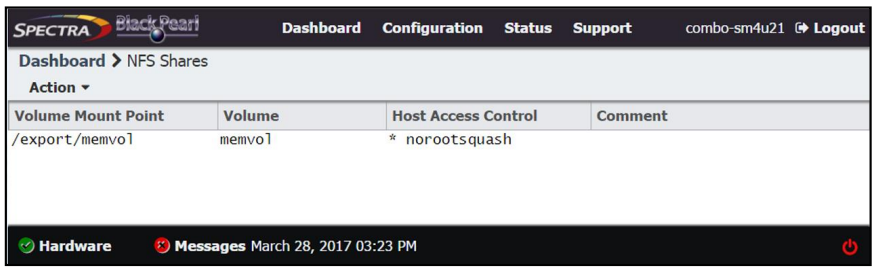
1. From the menu bar, select Configuration > NAS > Shares > NFS. The NFS Shares screen displays.
|
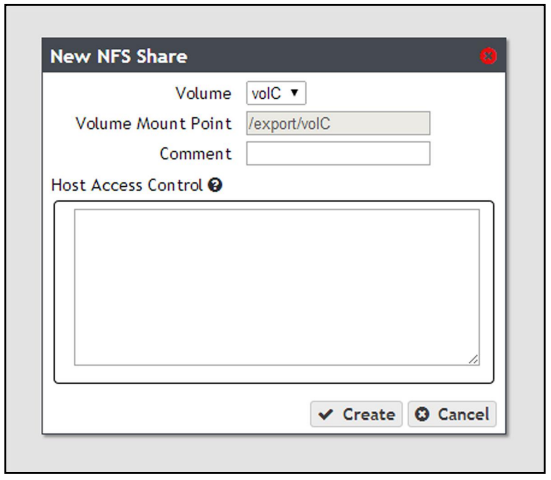
2. Select Action > New. The New NFS Share dialog box displays. 3. Use the drop-down menu to select the Volume you want to share. 4. The network address displayed for Volume Mount Point is the address of the share you are currently configuring. Note: Before mounting an NFS share, make sure the client supports the NFSv3 protocol and properly handles file locking. 5. If desired, enter a comment in the Comment field. This comment only displays on the BlackPearl NAS user interface. 6. In the Host Access Control pane, enter the IP address and permission level of all hosts that you want to access the volume. Hosts not listed are not able to access the volume. In addition to the host IP address, you must include one of the following permission parameters for each host you add to the BlackPearl NAS solution.
7. Click Create. The newly created share is listed on the NFS Shares screen |
 |
| Parameter | Description |
| norootsquash | Root Access—The host can access the NFS share with root access to the share. This host is used to set permissions for rootsquash users. |
| rootsquash | StandardAccess—The host can access the NFS share, but does not have root access. Standard access allows write permission to the share, but does not allow the user to delete, modify, or rename files for which they do not have write permission. |
| ro | Read Only—The host can access the NFS share, but cannot write data to the shared volume. |
For example, entering “192.168.32.25 rootsquash” allows the specified host to access the share with standard access.
If you want to allow all hosts to access the share, type * and include the permission parameter. For example, entering “* norootsquash” allows all hosts to access the share with root access.
After creating an NFS share, you can edit it to change the configuration.
1. From the menu bar, select Configuration > Shares > NFS. The NFS Shares screen displays.
2. Select the share you want to edit, and then select Action > Edit. The NFS Share Edit screen displays.
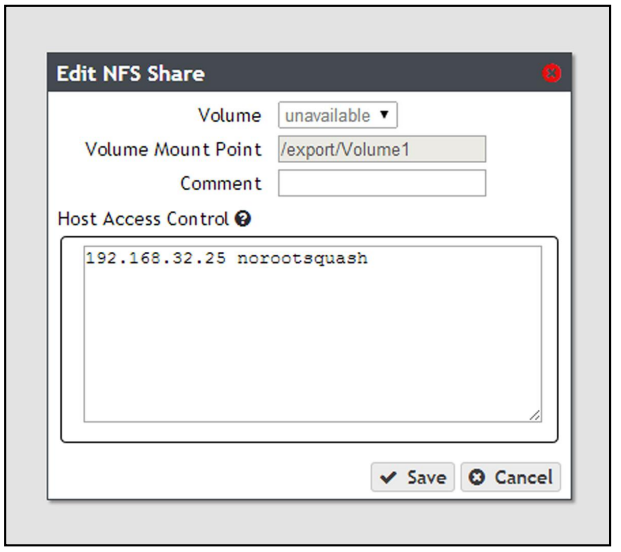
3. Make the desired changes, and click Save.
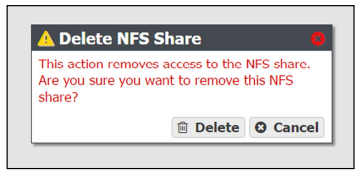
If you do not want to continue sharing a volume (that is, you do not want users accessing the NAS over a network connection to access the volume), you can delete the share.
Use the following steps to delete the share.
1. If you need to delete a CIFS share, from the menu bar, select Configuration > Shares > CIFS. The CIFS Shares screen displays.
—OR—
If you need to delete an NFS share, from the menu bar, select Configuration > Shares > NFS. The NFS Shares screen displays.
—OR—
If you need to delete a Vail share, from the menu bar, select Configuration > Shares > Vail S3. The Vail S3 Shares screen displays.
2. Select the share you want to delete, and then select Action > Delete.
Note: You cannot delete a Vail S3 share with data persisted to the volume. You must first delete the share as Storage in the Vail management console, then delete the share in the BlackPearl user interface.
3. A dialog box displays asking you to confirm the deletion. Click Delete to remove the share.
Note: Clicking Delete does not delete the volume. It only removes the volume from the list of shares and makes it inaccessible to remote hosts. The volume is still listed present on the solution and listed on the Volumes screen.
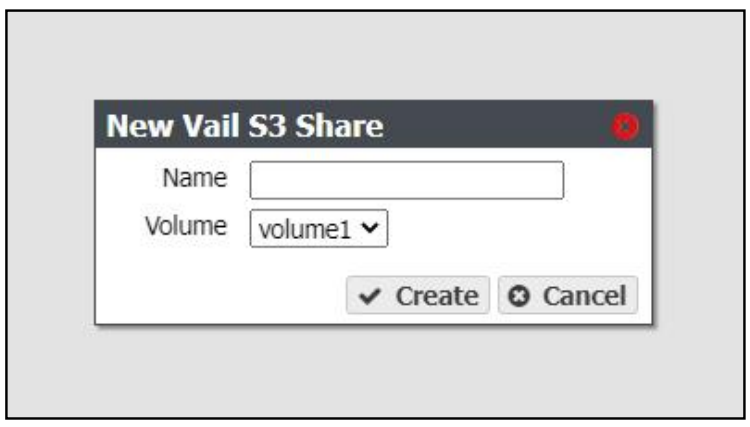
¶ Create Vail S3 Share
Use the following information to create a Vail S3 share.
Note: You can only create a Vail S3 share after registering the BlackPearl NAS solution to a Vail sphere
|
1. From the menu bar, select Configuration > NAS > Shares > Vail S3. The Vail S3 Shares screen displays. 2. Select Action > New. The New Vail S3 Share dialog box displays. 3. Enter the desired Name of the Vail S3 share. 4. Click Create. |
 |